
微軟在Mobile的解決方案,原先是建構Hockey App上面,不過,從今年五月開始就慢慢轉移到Mobile Center上面,無論是Build還是Test,甚至到發布,都可以透過Mobile Center幫忙完成,先前的一篇文章[VSTS 整合Visual Studio Mobile Center ]中有介紹把VSTS的Repositories與Mobile Center結合,現在Mobile Center的SDK除了原本的收集Crash Report和Analytics外,還可以讓你的APP自動檢查Mobile Center上面是否有新的版本,如果有新版本則是跳出下載提示,讓使用者可以直接更新App
在先前的Mobile Center有新版本發布時候,只能透過Mail通知用戶,還必須讓用戶點擊Mail中的連結後,再登入Portal去下載新版的App,整個體驗就很不好,也不夠直覺
使用In-app update前提
在自己App加入In-app update功能前,有幾個前提必須先知道,不然,就算把Code加入,也不會有動作
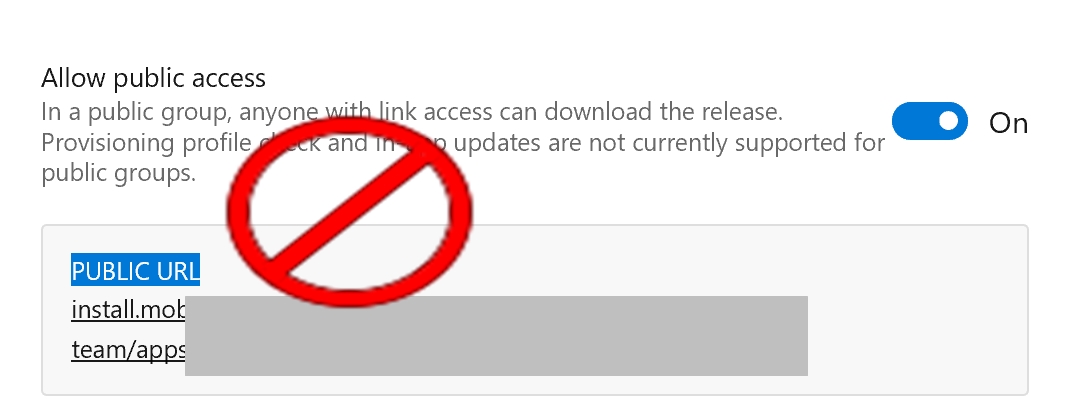
- 第一次下載APP,須用通知Mail內的連結下載,不能直接用Group的Public URL下載APP
- Build的Configuration必須是
Release,不然不會有做用 - 每次更新必須手動把
CFBundleShortVersionString和CFBundleVersion版本號更新 - 一定要透過Mobile Center的Distribute安裝APP
加入In-app update SDK
加入Mobile Center的Distribution SDK到程式中,以下使用的範例為Xamarin.Form,找到Microsoft.Azure.Mobile.Distribute並安裝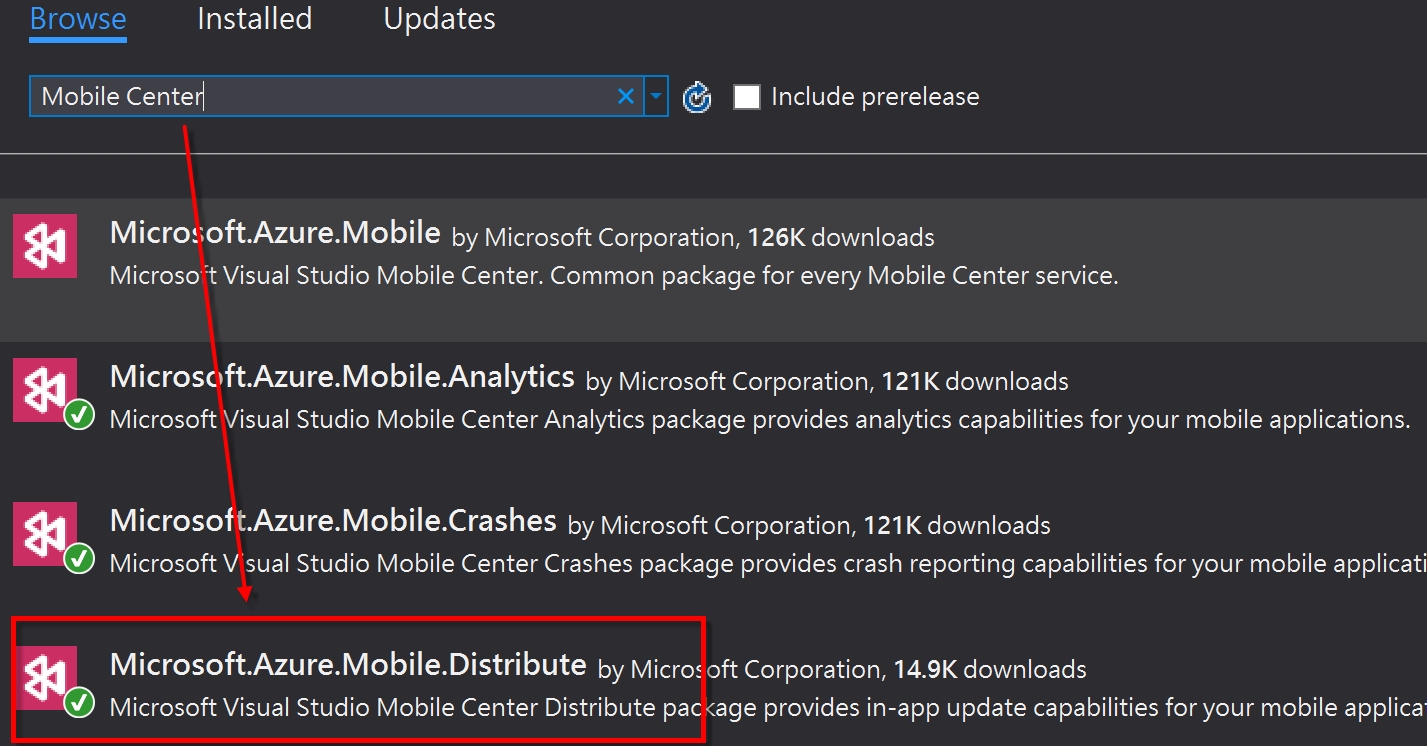
安裝好之後,可以在Mobile Center要發布App的Get Started或是Setting地方找到App Secret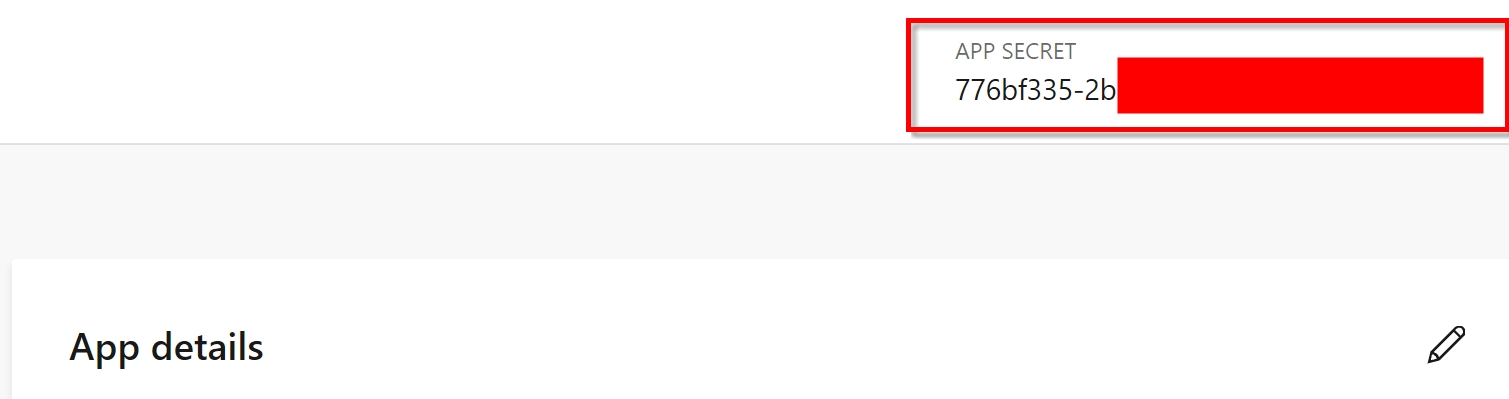
準備好以上條件後,先到App.Xml.cs的OnStart()加入啟動In-app update,在這邊可以發現,同時有加入typeof(Analytics) & typeof(Crashes)和typeof(Distribute),表示同時啟用收集Crash & 資料分析和In-app update功能,因為這三個功能都是共用同一個App Secret
|
|
裡面有一行是Distribute.ReleaseAvailable,這是自訂當有APP版本更新時候,會跳出的提示訊息,基本上,如果不做,預設因該還是會有提示方塊,不過,測試一陣子似乎還是不會出現提示訊息,導致沒有辦法更新APP,因此,如果是自訂一個提示訊息就可以進行App更新。
|
|
改好這邊後,還必須到Xamarin.app.ios的AppDelegate.cs加入app啟動時候就檢查版本功能,不管程式怎樣寫檢查更新的程式一定不能在LoadApplication(new App())之前,不過呢,又經過一番測試後,發現把這一行放在Xamarin.Forms.Forms.Init()之後是最穩的
|
|
另外,還必須到info.plist加入一個屬性,不過,因為在iOS中,測試App和Release的App是無法共用同一個Bundle Identifier,就如之前所說,Mobile Center中的Build Task是Mobile Center做好的,我們並無法在裡面做其他更改設定,這也導致無法在自動化時候去更新Bundle Identifier Name,所以,必須額外做一個Release用的plist檔案,讓在Release Build時候,置換原本的info.plist。因此,加入一個叫做InfoRelease.plist的檔案,並在這檔案中加入CFBundleURLTypes,這邊須至換掉裡面的{App secret},其值是跟ConfigurationManager.AppSettings["MobileCenterAppSecret"]}相同的
到這一步,基本上就已經讓App有了In-app update功能,剩下就是要把InfoRelease.plist置換成info.plist。
置換info.plist
做到這一點,就只能在專案檔中加入以下設定,先在Xamarin.App.ios的專案檔找到Info.plist關鍵字,基本上未修改前是這樣
修改後為這樣
這樣就可以在Release時候,將Release階段需要的資訊轉換成Info.plist給iOS App用了
確定功能沒問題話,在第一次安裝App後,會跳出一個網頁畫面,內容會有一段是Enable in-app Update,有這一段話,基本這個App就具有自動更新的機制了